 Save
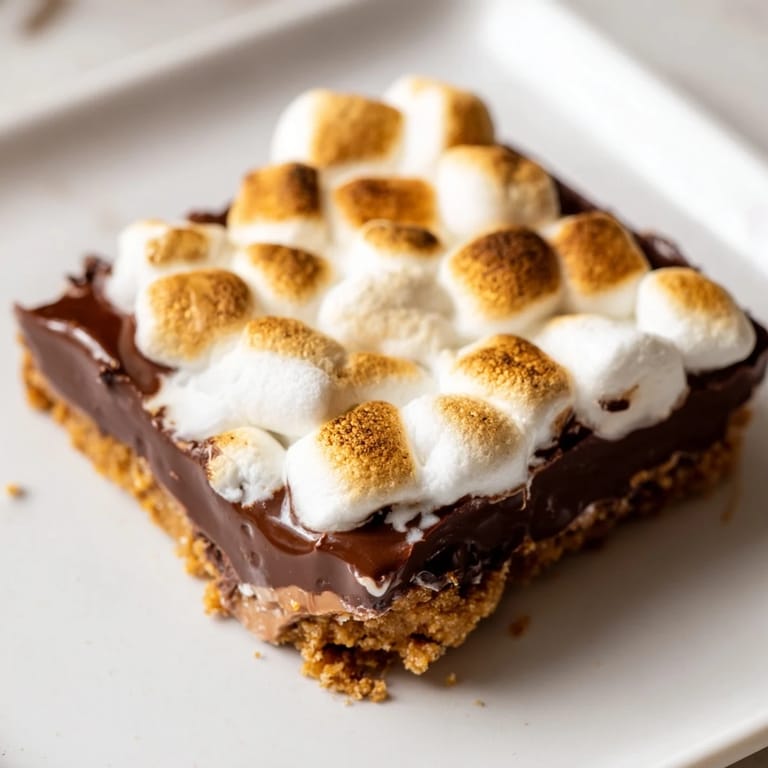
Save There's something about s'mores that stops time. My cousin pulled these bars out of her oven one July afternoon, and the kitchen filled with this warm, toasted marshmallow smell that made everyone freeze mid-conversation. She'd figured out how to pack all that campfire magic into a pan, no fire pit required, and honestly, I've been making them ever since because they're somehow even better than the real thing.
I made these for a potluck last spring, nervous they'd seem too simple or homemade next to everyone else's Pinterest-perfect desserts. When they disappeared in twenty minutes and someone asked for the recipe, I realized that simple and homemade are exactly what people actually want to eat.
Ingredients
- Graham cracker crumbs: The foundation matters here, so use actual graham crackers and crush them yourself if you can, they hold better than store-bought crumbs.
- Unsalted butter, melted: Melted butter absorbs into the crumbs evenly and creates that tender, almost sandy texture that holds together without being dense.
- Granulated sugar: Just enough sweetness in the crust without overpowering the chocolate and marshmallow layers above.
- Semi-sweet chocolate chips: The middle ground between dark and milk chocolate, they soften beautifully and don't compete with the marshmallows.
- Mini marshmallows: They toast faster and more evenly than large ones, and they press into the chocolate layer like little clouds.
Tired of Takeout? 🥡
Get 10 meals you can make faster than delivery arrives. Seriously.
One email. No spam. Unsubscribe anytime.
Instructions
- Make the crust:
- Mix your graham cracker crumbs, melted butter, and sugar together until it feels like damp sand, then press it firmly into your parchment-lined pan so it forms a tight, even base that won't crumble when you bite into it.
- Toast the base:
- Bake the crust for 8 minutes at 350°F so it gets slightly firm and begins to set, this keeps everything from sliding around once you add the chocolate layer.
- Melt the chocolate:
- Scatter chocolate chips over the warm crust and return it to the oven for just 2 minutes, then spread them out with a spatula while they're soft and glossy, creating an even blanket across the entire surface.
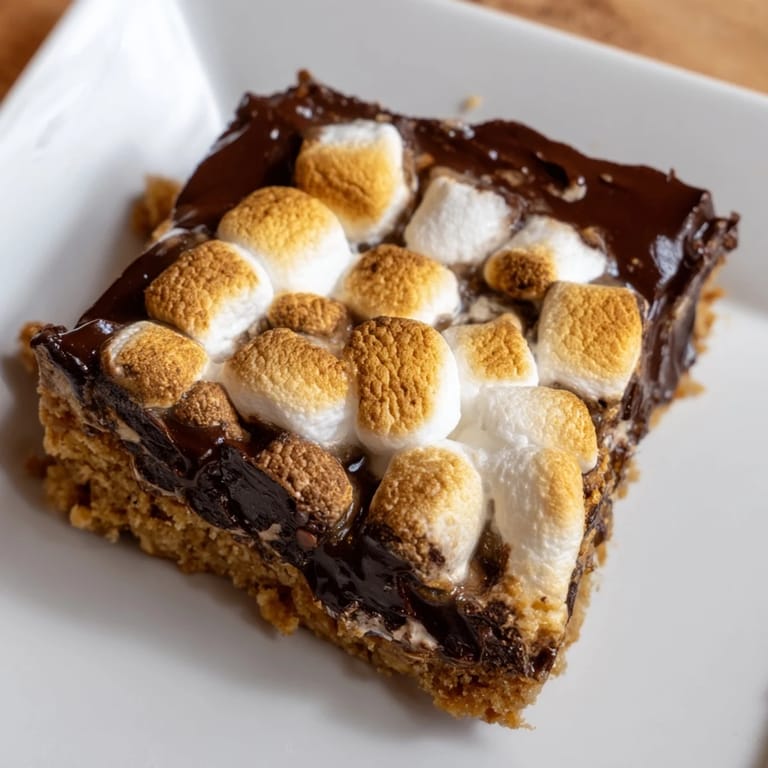
- Add marshmallows and toast:
- Press mini marshmallows gently into that still-warm chocolate layer so they stick, then bake for 10 to 12 minutes until they puff up and turn golden on top with little toasted edges.
- Cool and set:
- Let everything cool completely in the pan, then chill in the fridge for at least an hour so the layers set properly and you can make clean cuts without everything squishing together.
 Save
Save My daughter brought these to her school bake sale and came home talking about how someone asked if they were homemade because they tasted better than regular cookies. That's when I knew I'd found something worth keeping around.
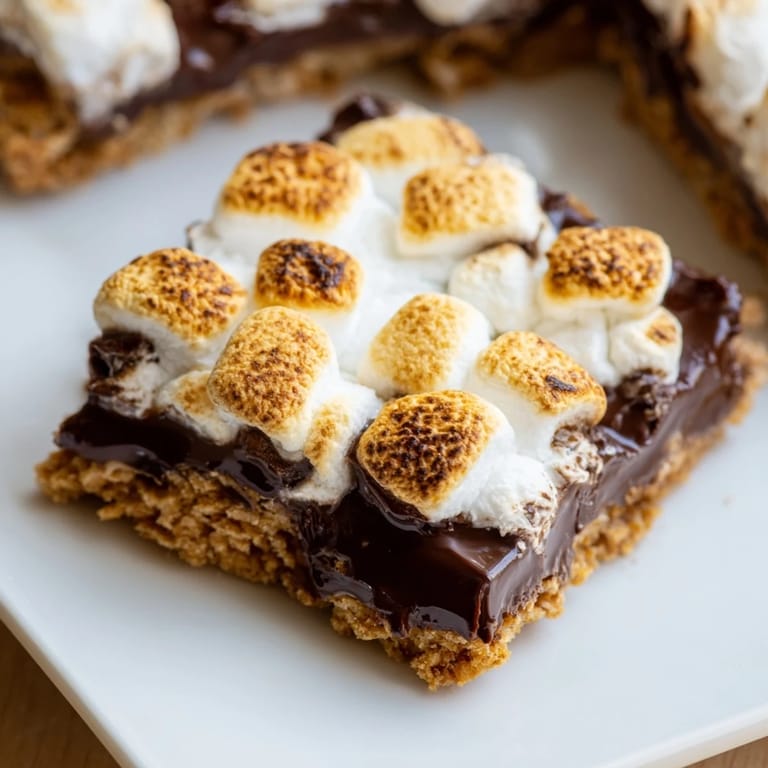
The Perfect Campfire Flavor at Home
These bars capture that specific combination of textures and flavors that makes s'mores so craveable, the buttery crunch of graham crackers, the richness of chocolate, and the slight resistance when you bite through a toasted marshmallow. What surprised me is how the flavors actually blend better here than when you're juggling everything over a fire, the chocolate stays stable, the marshmallows toast evenly, and nothing falls into the dirt.
Flavor Customizations That Work
Once you nail the basic formula, you can shift things around based on what you're craving. I've tried dark chocolate with a sprinkle of sea salt on top, which adds this sophisticated edge that changes the whole vibe. My sister swaps in digestive biscuits for the graham crackers and gets this richer, more sophisticated base that actually goes better with coffee. The beauty of this recipe is that the structure is solid enough that you can experiment without breaking anything.
Making Them Your Own
The magic happens when you trust your instincts and adjust to what you actually like eating. Don't stress about doing it exactly right the first time, the worst that happens is you end up with marshmallow-chocolate-graham cracker bars, which honestly is not a bad problem to have. Here's what I've learned works really well:
- Serve them slightly warm and they're gooey and perfect, serve them cold and they're more like actual candy bars.
- If you want extra toasting on top of the marshmallows, run them under the broiler for 30 seconds right before serving, but watch them closely.
- These keep in an airtight container for three days, though they're best within 24 hours when the texture is still at its peak.
 Save
Save Every time I make these, someone ends up with chocolate on their face and a huge smile, which is really all a dessert needs to be. They're proof that the best food doesn't have to be complicated, it just has to taste like a happy memory.
Questions & Answers for Recipes
- → What type of chocolate works best?
Semi-sweet chocolate chips melt well and balance the sweetness, but milk chocolate can be used for a sweeter touch.
- → Can I substitute the graham crackers?
Yes, digestive biscuits make a great alternative and alter the crust's flavor slightly.
- → How do I prevent marshmallows from burning?
Bake the marshmallows on moderate heat and keep a close eye during the last minutes to achieve a golden toast without burning.
- → Is chilling necessary before slicing?
Chilling the bars for an hour helps firm them up, making cleaner slices and enhancing the gooey texture.
- → Can I add any flavor variations?
A pinch of sea salt in the crust enhances flavor, and swapping chocolate types allows customization of sweetness intensity.