 Save
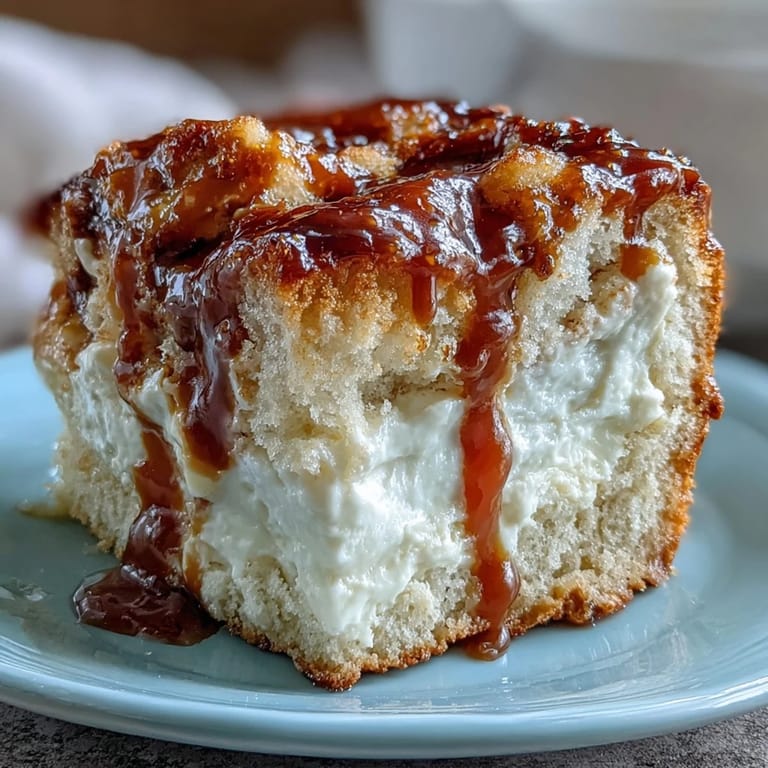
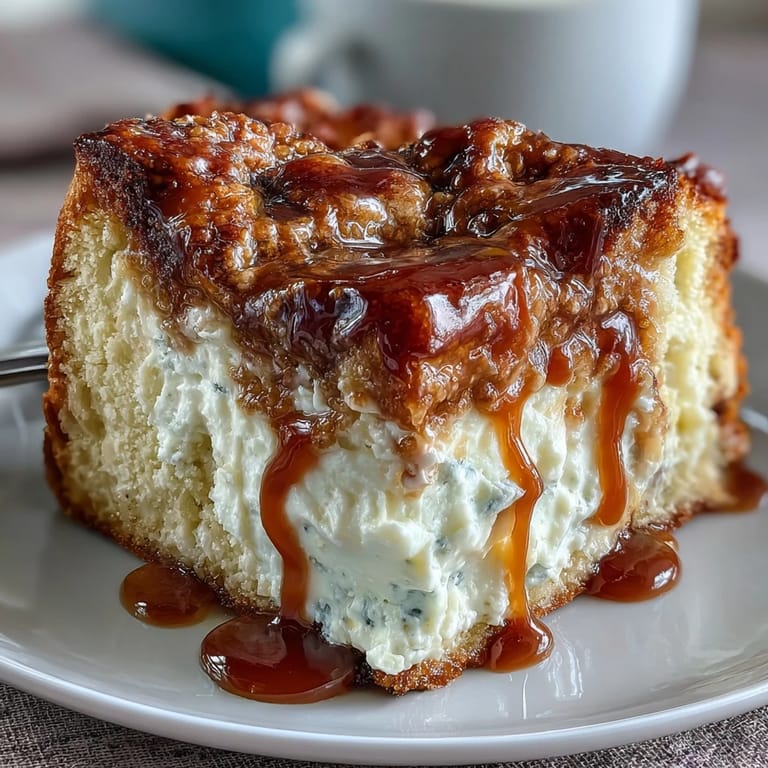
Save My neighbor showed up one Saturday morning with a loaf of this caramel cream cheese bread, still warm from her oven, and I was completely unprepared for how good it would be. The way the caramel ribboned through the tender crumb and hit that creamy center made me realize I'd been eating plain quick breads my whole life without knowing what I was missing. I asked for the recipe right there at the kitchen counter, and she laughed because she'd been making it for years without telling anyone. Now it's the bread I make when I want to feel like I've got my life together, even if I'm just winging it.
I baked these for a friend's book club last spring, and someone actually asked if I'd bought them from a bakery, which is the highest compliment a homemade bread can receive. She took a slice back to her car for later and texted me three hours later saying she'd eaten the whole thing in traffic. That's when I knew this recipe was special enough to make again and again.
Ingredients
- Light brown sugar: Don't skip the packing step—it adds moisture and creates that tender crumb that makes people wonder if there's butter in the batter.
- All-purpose flour: This is your structure, so measure it right; too much makes the bread dense, and too little makes it crumbly.
- Baking powder: Make sure it's fresh; an old tin sitting in the back of your cabinet will make this bread flat instead of fluffy.
- Salt: A small amount but crucial—it balances the sweetness and makes the caramel taste more like caramel.
- Eggs: Room temperature if you have time, but honestly cold ones work fine; they're just binding everything together.
- Milk: Whole milk gives richness, but 2% works, and so do oat or almond milks if that's what you've got open.
- Vegetable oil: Keeps everything tender; butter makes it slightly denser, which some people prefer.
- Cream cheese: Softened means you can actually beat it smooth without lumps that turn into pockets of sadness.
- Caramel sauce: Store-bought is perfectly fine and saves you from making it; homemade tastes richer if you have the patience.
Tired of Takeout? 🥡
Get 10 meals you can make faster than delivery arrives. Seriously.
One email. No spam. Unsubscribe anytime.
Instructions
- Set the stage:
- Preheat your oven to 350°F and grease two loaf pans well; the smell of the heating oven is part of the magic. This takes five minutes and saves you the disappointment of bread sticking.
- Build the dry foundation:
- Whisk together brown sugar, flour, baking powder, and salt in a medium bowl until everything looks evenly combined. This distributes the leavening so you get consistent rise instead of surprise craters.
- Blend the wet ingredients:
- Beat eggs, milk, and oil in a large bowl until they're honestly combined; this is where an electric mixer becomes your best friend. The mixture should look unified, not like three separate ingredients having a meeting.
- Marry wet and dry gently:
- Add the dry mixture to the wet ingredients and stir until just combined—overmixing is the enemy here and creates tough bread. Stop stirring the moment you don't see dry flour streaks anymore.
- Layer the base:
- Divide half the batter between your prepared pans, spreading it gently to create an even foundation. You're not looking for perfection, just coverage.
- Prepare the cream cheese layer:
- Beat cream cheese, sugar, and an egg until smooth and creamy; this mixture should be spreadable, not chunky. If your cream cheese is cold, give it a few minutes at room temperature first.
- Create the creamy center:
- Spoon the cream cheese mixture in a line down the center of each loaf; this is where precision isn't necessary, just aim for the middle. The filling doesn't need to be perfect—slight irregularities make it more homemade looking.
- Cover the filling:
- Top with the remaining batter, spreading gently to cover the cream cheese layer completely. Use a spatula dipped in water to make this easier and less messy.
- Add the sweet swirl:
- Drizzle caramel sauce in a thin line over the top of each loaf, then swirl it gently with a knife—the key word is gently. Too much swirling mixes everything together and you lose the distinct caramel ribbons.
- Bake until golden:
- Bake for 50 minutes until a toothpick inserted into the center comes out mostly clean; some cream cheese clinging to the toothpick is actually a good sign. The top should be golden brown and springy when you touch it.
- Cool with patience:
- Let the loaves cool in the pans for 10 minutes so they set enough to remove without falling apart. Then turn them onto a wire rack to cool completely before slicing, which takes longer than you'd think but prevents gummy interiors.
 Save
Save I learned the value of this bread when my mom was going through a rough week and I brought her a loaf still warm from cooling. She ate two slices at the kitchen table and actually smiled for the first time that day, which reminded me that sometimes the smallest gestures—a homemade quick bread, really—can be exactly what someone needs.
The Secret to Tender Crumb
The trick that transformed my quick breads from dry and dense to moist and tender was understanding that brown sugar already contains molasses, which adds moisture. When I switched from all granulated sugar to brown sugar, everything changed—the crumb became so tender it almost feels like it's dissolving on your tongue. The acid in the molasses also reacts slightly with the baking soda, creating a finer, more delicate crumb structure than you'd get otherwise.
Why Cream Cheese Stays Put
Most quick breads fail at the cream cheese layer because people try to fold it in or swirl it too much, and it gets lost in the batter. By placing it as a thick line in the center and covering it quickly, you're creating distinct layers instead of a homogenous mixture. The cream cheese is also binding with the egg in its own filling, which makes it more stable and less likely to migrate throughout the bread.
Making This Your Own
Once you've made this bread once, you'll start seeing it as a blank canvas for your own additions. I've added chopped pecans to the cream cheese layer, drizzled it with salted caramel instead of regular caramel, and even made a version with a cinnamon swirl that my kids still ask about. The base recipe is strong enough to hold whatever flavors you want to layer on top, which means you can make it the same way forever or reinvent it every time.
- Mini loaves bake in about 40 minutes and look impressive on a holiday brunch table without requiring extra time commitment.
- A drizzle of cream cheese glaze on top after cooling adds elegance and extra moisture that makes people think you spent hours on this.
- This bread actually improves on day two when the flavors settle and the crumb becomes even more moist, so make it ahead without guilt.
 Save
Save This bread has become my go-to gift and my reliable weekend breakfast, the kind of recipe that sits in the front of my recipe box because I reach for it so often. Every time I make it, someone asks for the recipe, and I never get tired of seeing their face when they taste that first slice.
Questions & Answers for Recipes
- → How do I know when the bread is done baking?
Insert a toothpick into the center of the loaf. It should come out mostly clean—some cream cheese residue on the toothpick is perfectly normal since the filling remains soft and creamy. The top should be golden brown and the edges should start pulling away from the pan slightly.
- → Can I use homemade caramel sauce instead of store-bought?
Absolutely! Homemade caramel sauce works beautifully and often has a richer, deeper flavor. Just ensure it has cooled to room temperature before drilling over the batter. If it's too warm, it may sink too deeply into the batter rather than creating distinct swirls.
- → Why did my cream cheese sink to the bottom?
The cream cheese layer should be spooned gently onto the first layer of batter, then covered completely with remaining batter. Avoid over-mixing or spreading too vigorously, which can cause the filling to sink. The batter should be thick enough to support the creamy layer.
- → Can I freeze these loaves?
Yes, these freeze exceptionally well! Wrap cooled loaves tightly in plastic wrap, then foil, and freeze for up to 3 months. Thaw overnight at room temperature. The texture remains perfectly moist after freezing, making these ideal for make-ahead breakfasts or gifts.
- → What's the best way to swirl the caramel?
Use a thin knife to gently drag through the caramel and top batter layer in a figure-8 or circular motion. Only make 2-3 passes—over-swirling will muddy the pattern and mix the caramel too thoroughly into the batter, losing those beautiful distinct ribbons.
- → Can I make this as muffins or mini loaves?
Yes! For mini loaves, use six mini pans and reduce baking time to approximately 40 minutes. For standard muffins, fill liners two-thirds full and bake for about 12-15 minutes. Adjust baking time based on size—the center should be set with the cream cheese layer still creamy.